How to Input Client Information Using the Paper Client Intake Form
Note: This feature is only available to Senior Place Premium customers.
If you prefer to gather a client's information on paper, there is a simple way to automatically input information from the paper intake form into the respective client's profile. Here are the steps:
1) Locate the Paper Intake Form
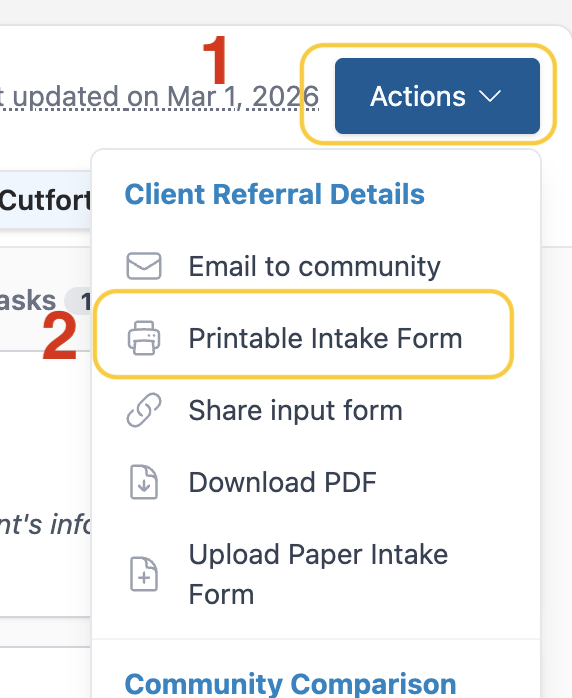
- Click Actions
- Click Printable Intake Form
2) Print the Paper Intake Form
Note: If the paper intake form is not displaying correctly for printing, you may need to update your printer paper size settings.
3) Upload the Form to the Client Profile

- After you've filled out your form, take a picture of your completed intake form and upload this image to your device.
- Navigate to the client profile where you would like to upload the information tracked on your paper form. In this example, I've gone to to a new client profile.
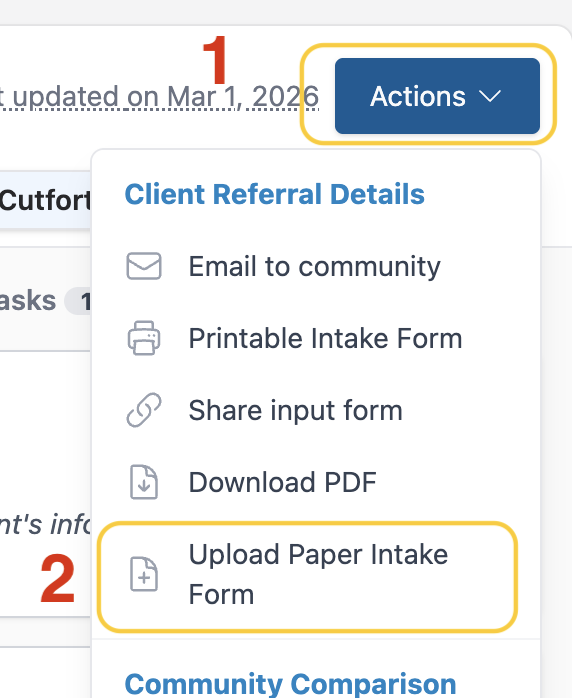
- Click Actions
- Click Upload Paper Intake Form

- Click Upload File
- Select the completed intake form file.
Note: Only JPEG files are supported for upload. If your form is not a JPEG file, you will need to convert it to the correct file type.

- Your upload may take a few minutes to complete. You will be given confirmation once your form information is uploaded.
- Verify the information in your client profile to ensure it was uploaded correctly.
If you would like to save the paper hosted intake form file directly in the client profile for future reference, this tutorial walks you through how to do that.
Have more questions? Feel free to reach out to us at support@seniorplace.com!