All About Tours
When a tour is scheduled for a client, you may want to track this tour information directly in their client profile and be able to view your upcoming tours on your Senior Place calendar. Here’s how you are able to do this:
How to Add Tours to a Client
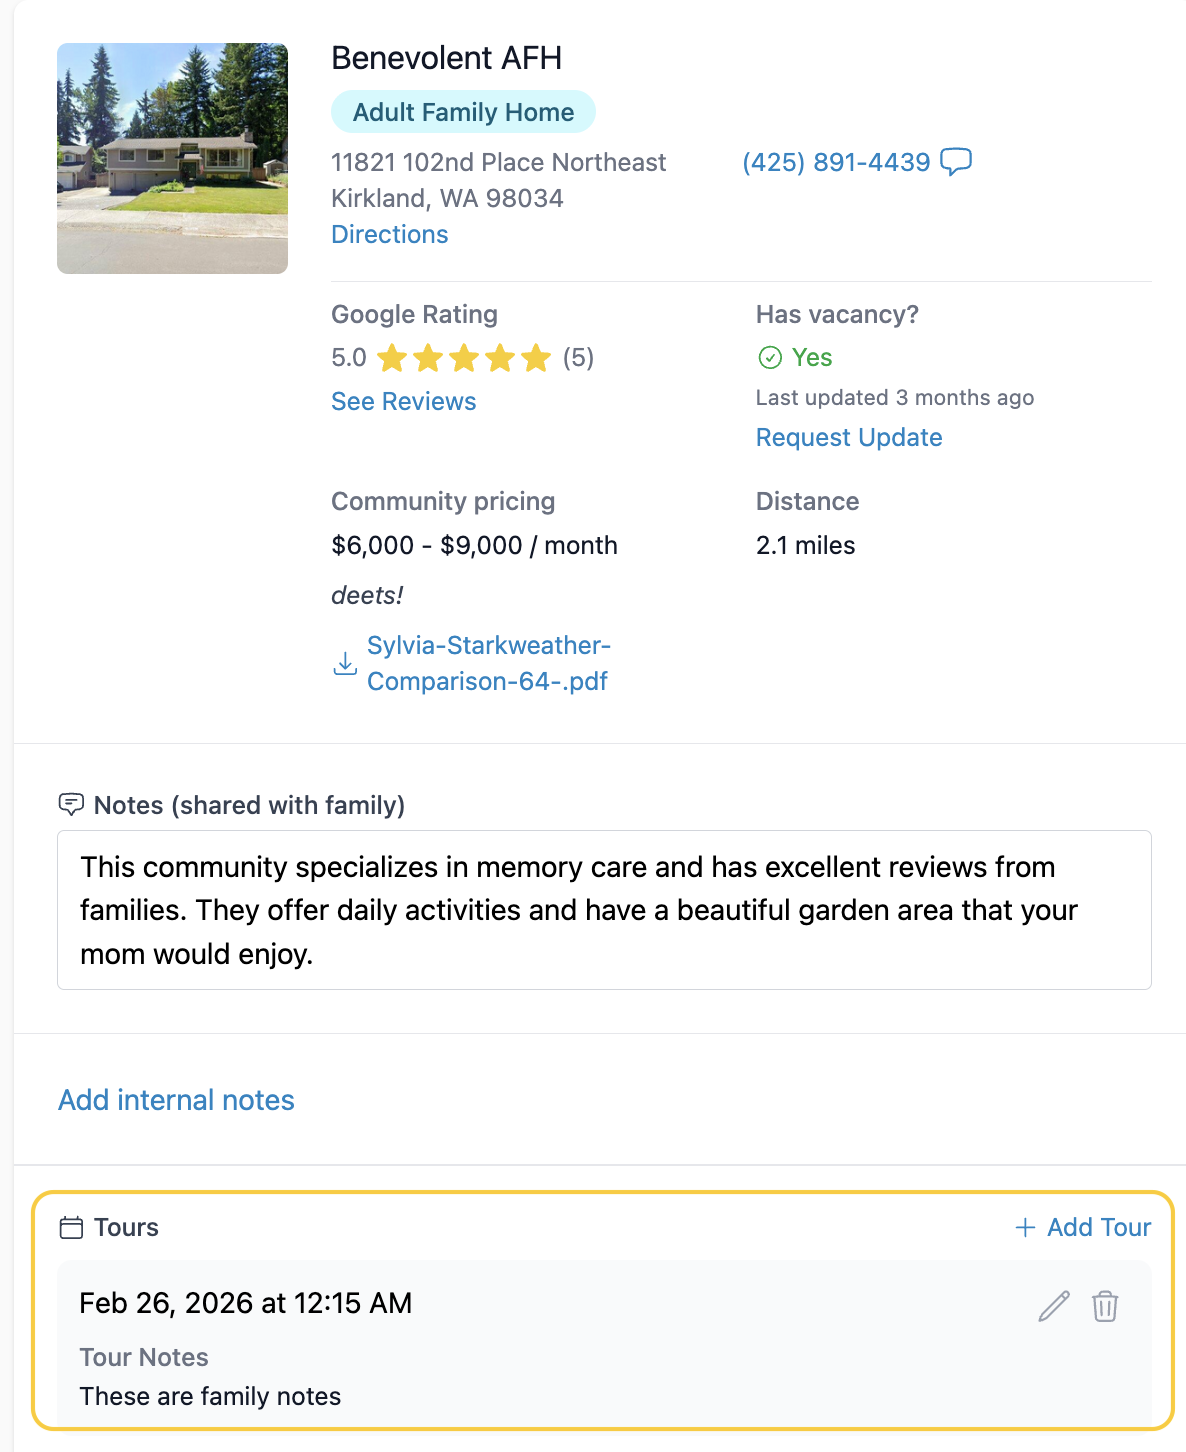
1) Navigate to the Community Options Tab of a Client Profile

From within a client’s Community Options tab, you are able to add community tours by clicking + Add Tour on the community card.
2) Customize Your Tour Information
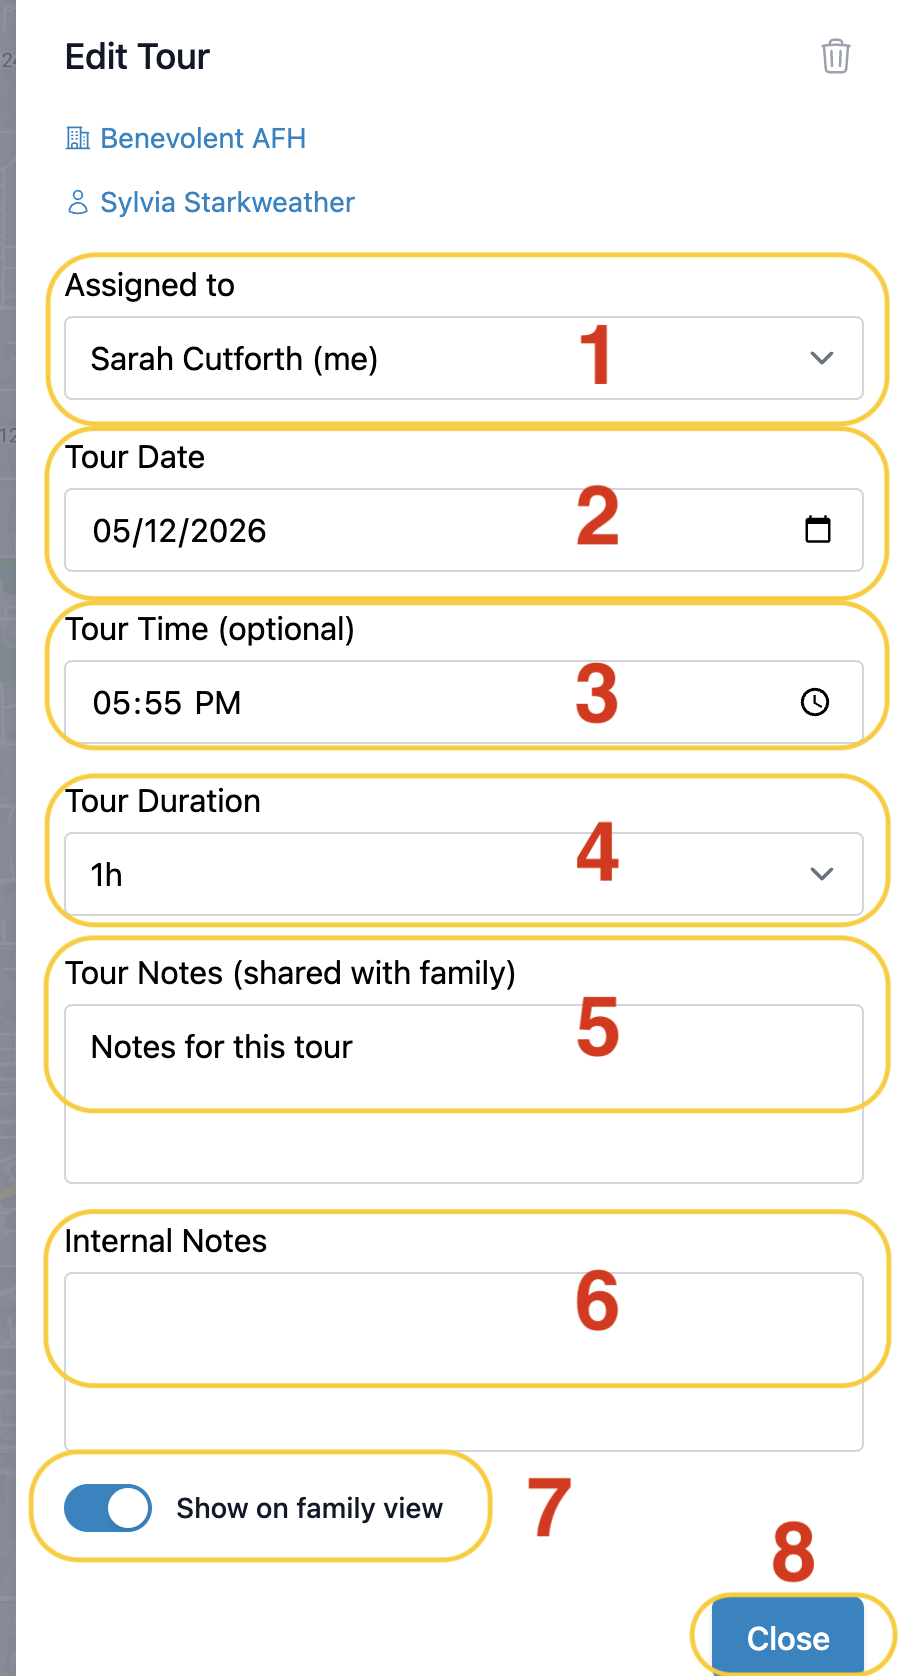
After clicking + Add Tour you'll be able to input your tour information Including:
- Who the tour is assigned to
- Input the tour date
- Select the tour time
- Add you tour duration
- Add Tour Notes. The family will be able to view these notes
- Add Internal Notes. These notes will not be shared with the family
- Choose whether to show this tour in the family view
- After entering your information click Close
How to Edit or Delete Tours
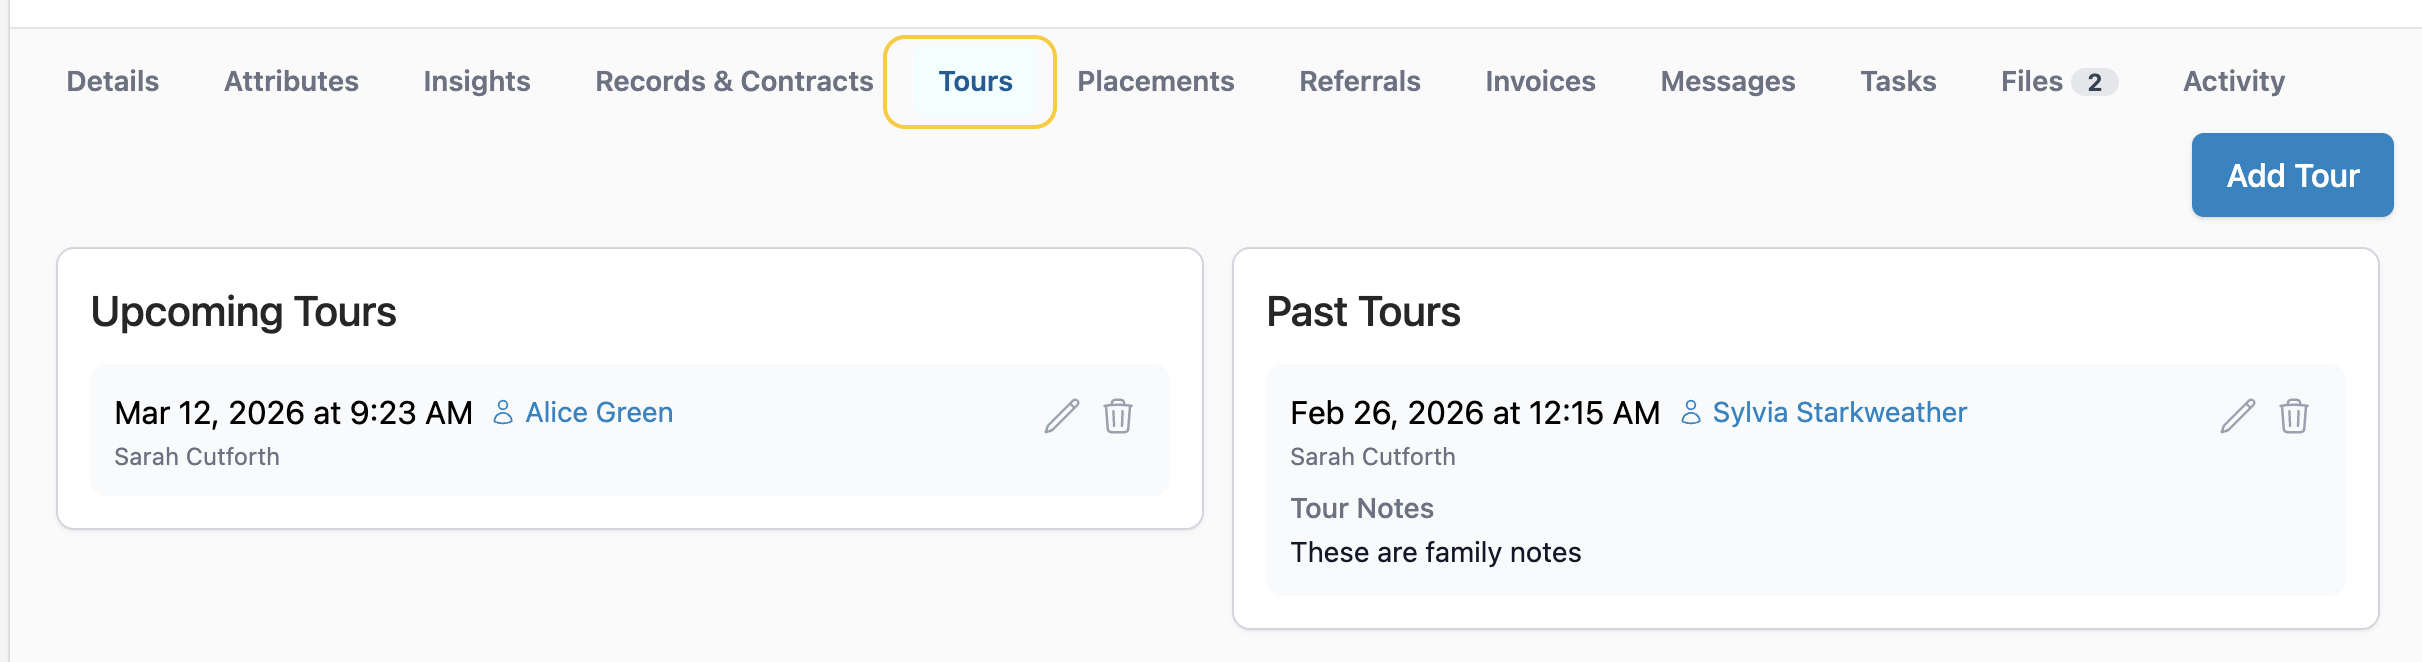
1) Within The Client's Community Options tab or the Communities Tours tab
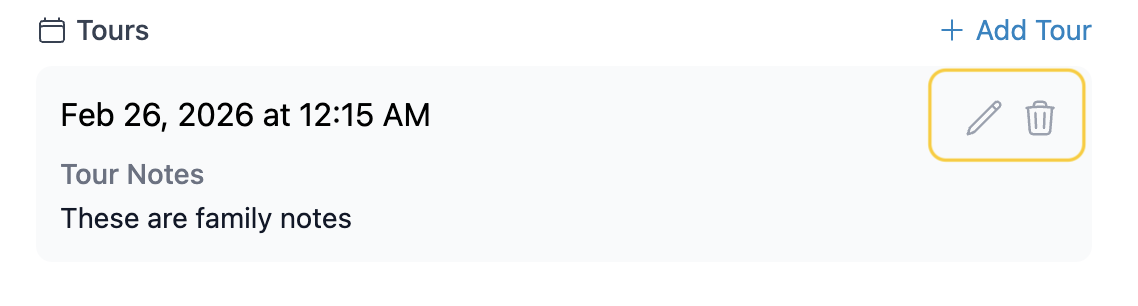
You are able to edit or delete tours from these locations by clicking on the pencil icon to edit or the trash can icon to delete.
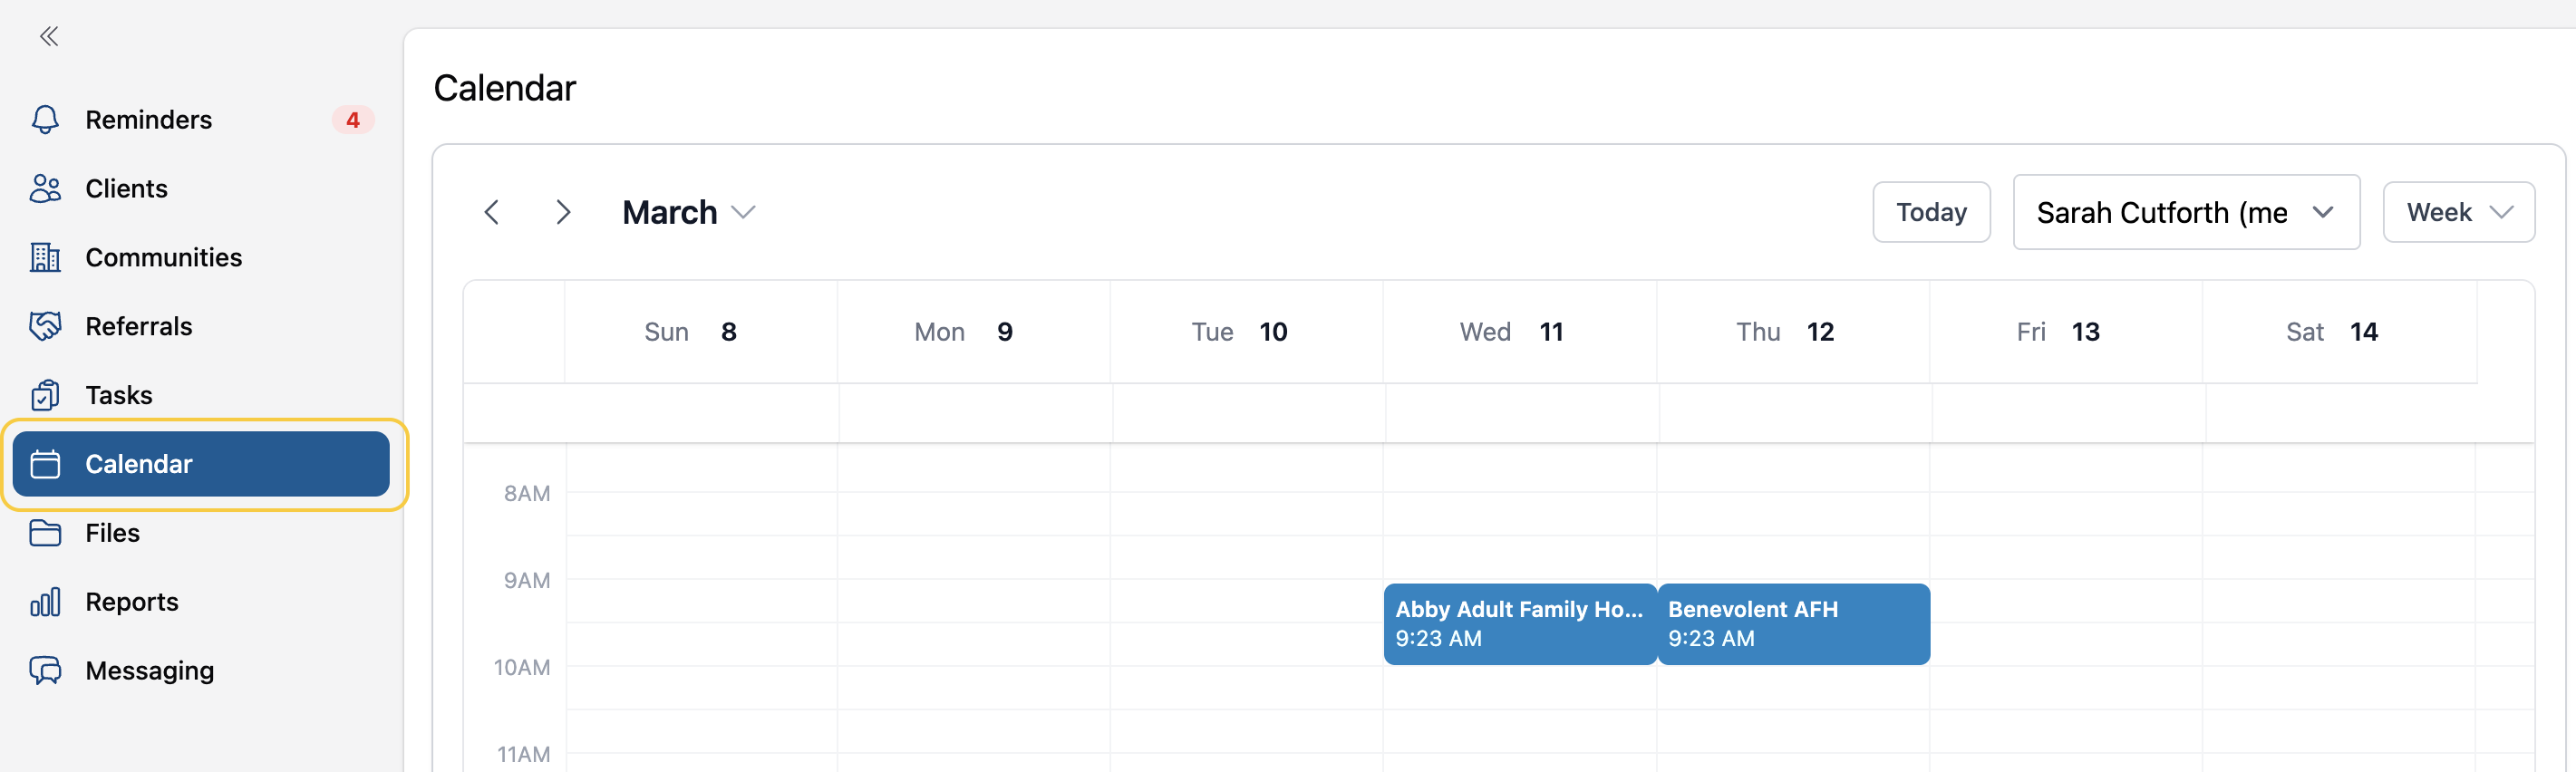
2) Within The Senior Place Calendar
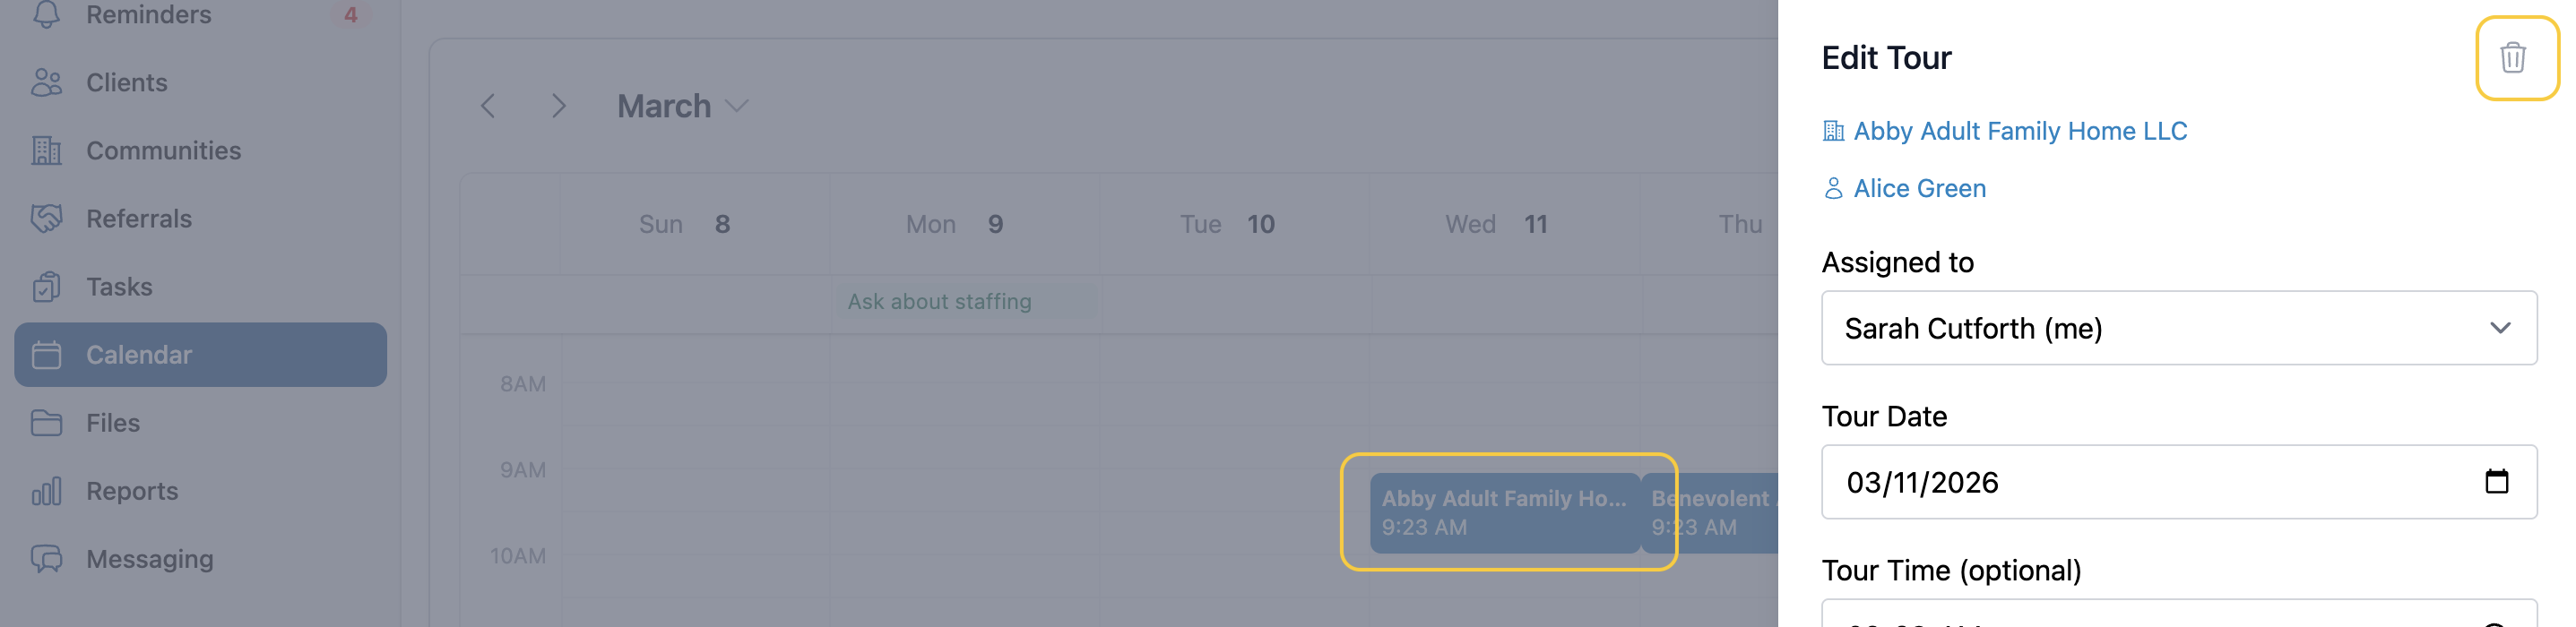
You can edit a tour here by clicking on the tour. After clicking on the tour, you are able to delete it by clicking on the trash can icon.
Where to View Tours
After creating tours, you can view them in several areas throughout the platform.
1) In the Client’s Community Options Tab
2) In the Communities Tours Tab
3) In your Senior Place Calendar
Where Can a Client View Tours
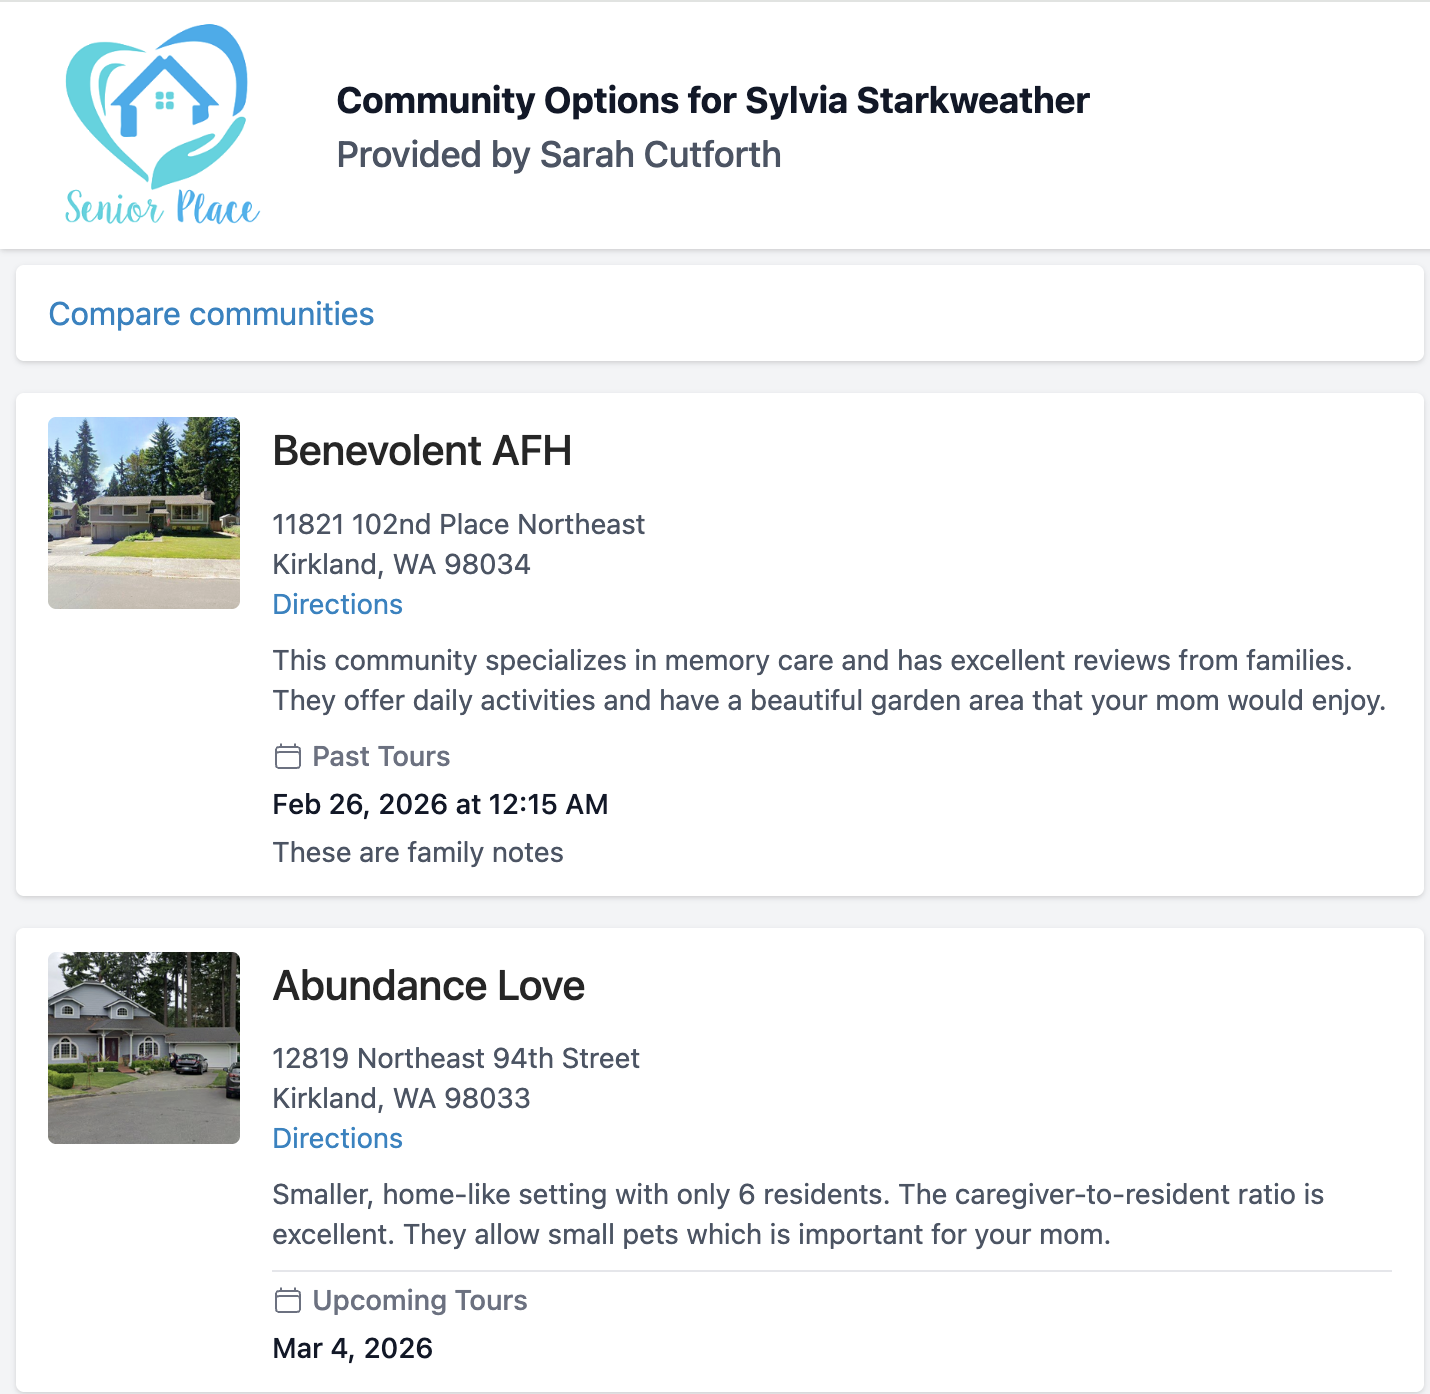
A client is able to view tours in their community comparison shareable link. Tours are not displayed on the PDF community comparison or in the Compare Communities view on the shareable link.
Have more questions? Feel free to reach out to us at support@seniorplace.com!