How to Request and View Community Availability Information
Note: There are two separate workflows for requesting community information—one for pricing and one for availability—but both lead to similar outcomes. Requesting availability not only gathers the community's availability information but also gives them a chance to submit pricing information.
When finding ideal communities for your client, having up-to-date availability information can save you precious time and prevent you from needing to call or text facilities every time you're working with a new client.
This tutorial walks through how to request and view community availability information as you're working in Senior Place.
If you'd also like to see exactly what a community contact sees when they receive and submit a request, simply navigate here.
Request Availability Information
Note: You can only request availability information for communities Senior Place has added to your database. At this time you aren't able to request availability for communities that you add manually.
This process only needs to be completed once by a Senior Place user to enroll the community in providing availability. If availability data is already being provided, you can skip requesting availability and learn how to view availability information instead.
1) Choose to Request Availability
Availability information can be requested in one of four locations! Choose whichever works best for your process:
A) Community Insights Tab
From within the Community profile, navigate to the Insights tab and look for the Availability section. Within that section, you'll notice a Request Availability button if the community isn't yet providing availability information.

B) Client Find Ideal Communities Tab
Within the Find Ideal Communities tab of a client profile, search for the Has vacancy? section on the community cards. In that section, you'll notice a Request Availability button if the community isn't yet providing Availability data.

C) Client Community Options Tab
Within the Community Options tab of a client profile, search for the Has vacancy? section on the community cards. In that section, you'll notice a Request Availability button if the community isn't yet providing Availability data.

D) Within the Client Referral Email Builder
Note: If you choose this option, you can skip Step 2 below.
When sending out your client referral to the chosen communities, you can also opt into Requesting Availability automatically at the end of that referral email.

2) Send Availability Request
After clicking Request Availability (whether you chose to do so in step 1A, 1B, or 1C), proceed by customizing and sending the availability request email to the relevant community contacts:
- Edit recipients (optional)
- BCC yourself (optional)
- Edit the email subject and body (optional)
- Click Send

Once the request is sent, you'll be able to see the email in the Community's Messages tab.
View Availability Information
Once a community has enrolled in providing availability information, they'll be prompted to update that information on a weekly basis, and you can always view the current update in the following locations:
A) Community Insights Tab
From within the Community profile, navigate to the Insights tab and look for the Availability section. Within that section, you'll notice the community's availability status along with any additional notes and when the last update took place.

B) Client Find Ideal Communities Tab
Within the Find Ideal Communities tab of a client profile, search for the Has vacancy? section on the community cards. In that section, you'll notice either a Yes or No, depending on what information the community provided. To see further details, navigate to the Community's Insights tab.

C) Client Community Options Tab
Within the Community Options tab of a client profile, search for the Has vacancy? section on the community cards. In that section, you'll notice either a Yes or No, depending on what information the community provided. To see further details, navigate to the Community's Insights tab.

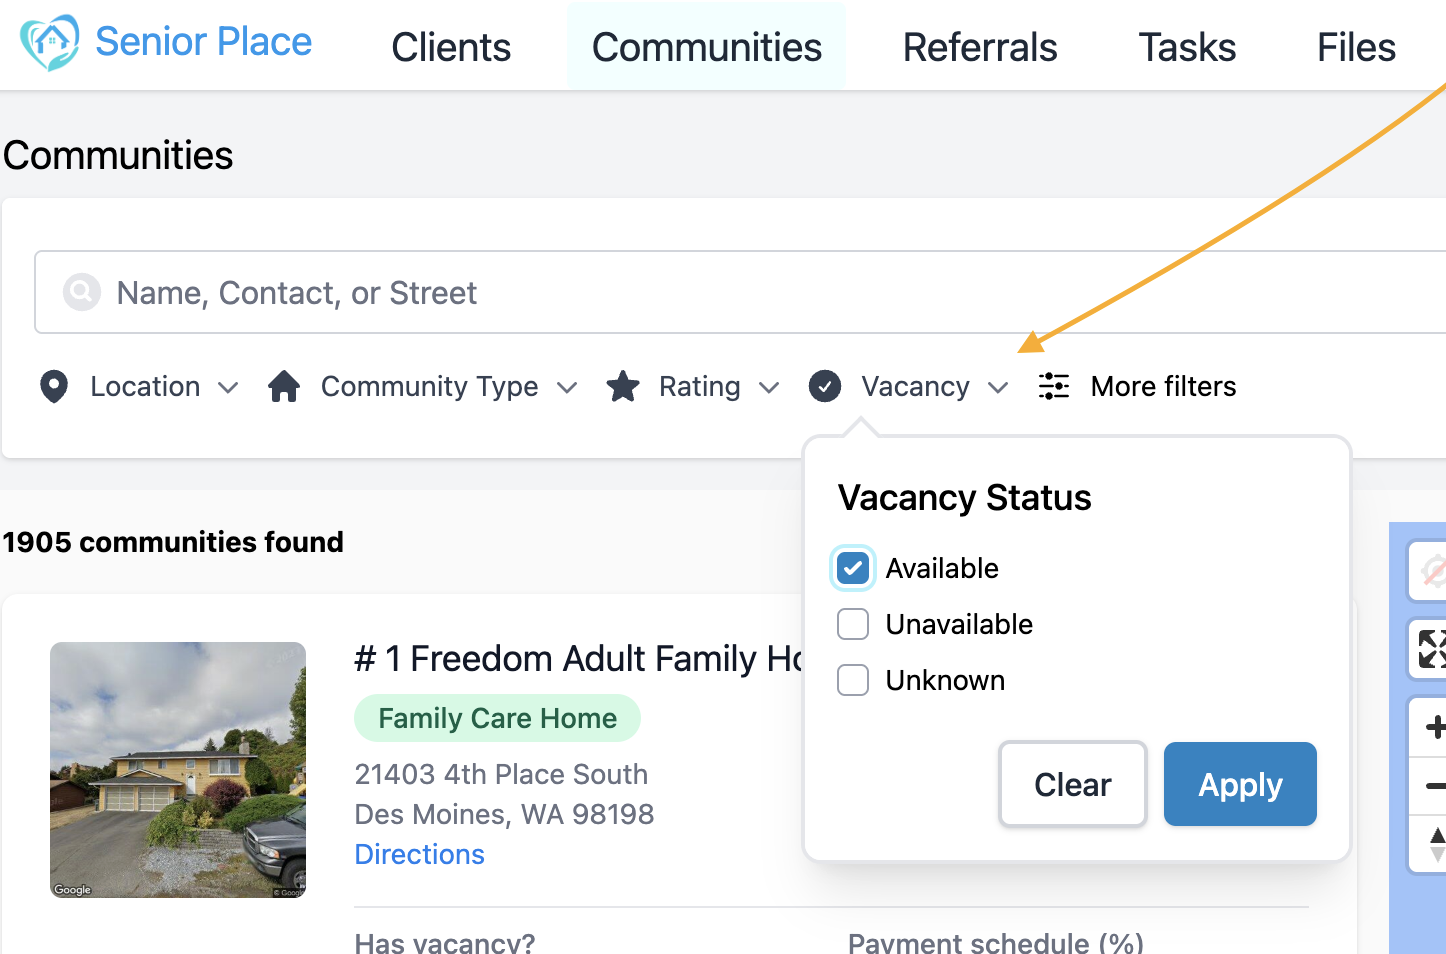
D) Communities Module and Find Ideal Communities Tab
Within the Communities module (and Find Ideal Communities tab of a client), you can filter communities based on their reported availability by using the Vacancy filter.
Have more questions? Feel free to reach out to us at support@seniorplace.com!